
The Annual NAS Challenge
For some reason I like to build large storage arrays. I do tend to eat up a lot of storage and over time I’ve filled them up. For the last couple of years I’ve gone big and in 2016 I decided to just buy an off the shelf Drobo 5N filled with 5x 4TB SATA drives. It’s fine but there have been a few issues with it – the lack of active directory integration means I cannot securely use it to store virtual machine disk images for Hyper V Server and a lack of iSCSI and slightly lack-lustre out the box NFS implementation has left me with the same problem for VMWare ESXi virtual machines. I’ve ended up just using it to store all my old backups and ISOs but don’t feel I’m getting the most out of it.
I had some old parts sat around that I shared on Facebook a while ago – motherboards, CPUs, RAM and a lot of disks. Amongst them were 4x 4TB matched SAS drives and a SAS HBA I had used on a project a couple of years ago. At that time I was working on a NAS that I never quite felt happy with and then personal issues meant I had to leave it in an undesired state. Most of it got torn down but a few bits remained so this year is mostly a rebuild of a NAS from the past but with a clear intention on stability and performance – at least matching my Drobo 5N when it comes to network speed.
The last NAS had a number of issues:
- Trying to get everything in to a 2U case proved extremely loud and messy
- Consumer grade hardware posed issues with OpenIndiana, switched to FreeBSD
- iSCSI stability issues – regularly lag spikes
- Speed never ended up particularly high
- Significant management overhead just to keep it running
I did however really enjoy working with ZFS and found iSCSI worked wonderfully for my virtualization needs. With a focus on backing virtual machines for my projects and learning from this build in the past this year’s requirements are:
- iSCSI protocol
- SMB with Active Directory integration
- At least 100MBps sustained speed for an iSCSI read or write operation
- Potential for link aggregation
- ZFS implementation
- Rapidly upgradeable NAS operating system
- Low management overhead
- Needs to look good and remain quiet on my desk as this won’t be in a data centre or rack mounted in my garage
A Virtual Solution
To meet my requirements the first thing I decided on way to go with an out-of-the-box FreeNAS installation. It handles iSCSI and ZFS but prevents me needing to look and manage everything under the hood if I don’t want to. It also comes with pretty good (apart from web authentication) integration with Active Directory which means it will be easy for me to setup and manage for iSCSI and SMB without installing a tonne of extra software. Having played with FreeNAS 9 and the beta of 10 during testing I decided to stick with the latest stable release of FreeNAS 9. I had a bunch of issues with the web interface and even the boot loader on FreeNAS 10. Whilst I think 10 is a landmark shift away from the issues I’ve always had with previous versions of FreeNAS it’s definitely not there for daily use yet.
The next big decision was how to manage upgrades. Knowing the issues I had testing FreeNAS what I didn’t want was to make a decision to upgrade FreeNAS at some point, or switch to another ZFS-based operating system, and end up with my NAS and consequentially virtual machines unavailable for a whole week. The solution – virtualising my NAS and using a bare metal hypervisor as the actual underlying operating system on the hardware.
Running FreeNAS in a virtual machine works and is supported but there are a few caveats – the main being that any disk which FreeNAS itself is sharing out needs to be as close to the physical hardware as possible. Creating a physical RAID array, having the RAID adapter setup in the hypervisor and then creating several disks for ZFS to be configured on in a FreeNAS virtual machine is the worst possible thing you can do. All the optimisations that ZFS does are negated but underlying technologies and it becomes a worst-of-all scenario.
I decided to go with VMWare ESXi 6.5 as my hypervisor. I’ve used 5.5 a lot and wanted to try the new version. I did consider Hyper V Server 2016 and gave it some testing but found a few limitations that frustrated me and decided (other than my desktop PC) I would stick to VMWare across all my virtualisations.
Using ESXI 6.5 left me with a simple solution. The 4TB SAS disks that will form my storage array are connected to a HBA which can, in turn, be directly passed through to the virtual machine. This makes my LSI SAS2008 card appear to FreeNAS as if it is installed locally. Because the card is where the disks are connected to VMWare never even sees the 4TB disks. The HBA itself is one I used a couple of years ago and blogged about at the time to make sure it just presents disks and does not RAID on top of them (note even JBOD). Passing through the HBA required enabling IOMMU in the motherboard and selecting the device in VMWare as a pass-through device. The mother board also has eSATA ports that I passed through even though I am not using them at this point.
For the FreeNAS boot disks I use SSDs. Unfortunately, I cannot pass these through and nor is there any underlying RAID on them. To give me some stability here I have two separate SSDs. I have created a virtual disk on each of these which are then configured in a ZFS mirror for the FreeNAS boot drive. Whilst this is not as ideal as having them directly passed through to VMWare it does mean that I have a mirror for protection against single drive failure and performance on them will be more than adequate to boot with. I also didn’t want to pass these through as I’d then lose some of the advantage of hot-swapping the underlying operating system unless I kept adding disks.
This virtualised solution means that I can configure FreeNAS with 16GB of RAM and 6 cores which will be fine for my daily use and then create a second VM with everything other than the PCI Express pass-through enabled. I can then get everything working and ready for migration. If I want to then switch to a different underlying operating system for my NAS I just shut down the initial VM, attach the PCI Express HBA to the new VM, start it up and import the ZFS volumes – this entire process will take a couple of minutes and can be dry-run through first. I am sacrificing some RAM here to FreeNAS but for my use case I think the versatility is better.
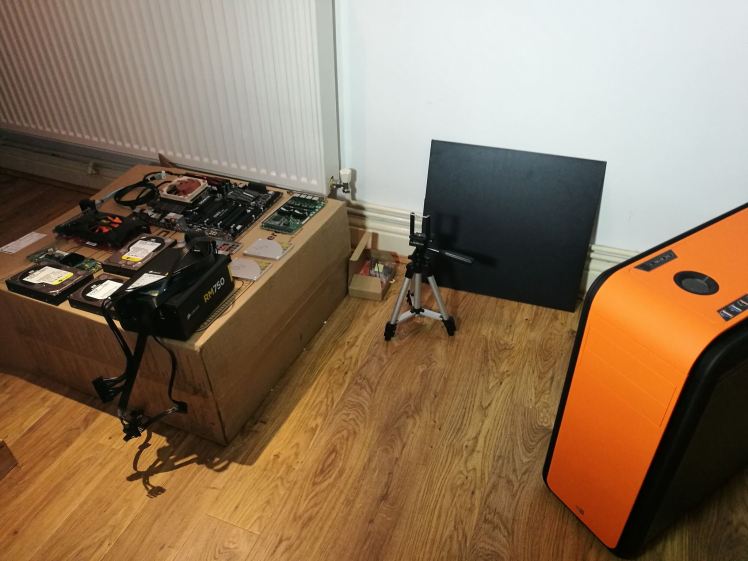
To complete this built I’m going to be using the hardware I have listed here. This includes a 6-core processor, 32GB RAM, an Intel quad gigabit NIC, a GTX 460 graphics card and most importantly an Aerocool DS200 case in fluorescent orange. I’d love to say I selected the case for the number of disk bays and noise dampening that it provides but the truth of it is I loved just how orange it is. I did a separate review of the case recently – it isn’t amazing but it is orange and works well for my purposes.
The Build
The build is detailed in full in the video at the top of this post and there will also be separate videos coming up showing how I configured FreeNAS and ESXi to enable this configure in full. Rather than rehashing everything here it all went pretty well though apart from a few issues that did crop up.
I started by almost bricking my SAS HBA. When swapping from a low-profile to full-sized bracket I got annoyed at a screw, removed its thread and almost snapped the PCB whilst trying to remove it. Thankfully everything still worked. Don’t get mad at your HBAs folks, it rarely ends well. There were a few issues with cable management – namely how little space this case provides behind the motherboard tray – and the graphics card makes more noisy than I’d like (but it does have an orange fan), however the physical build was fine other than these minor issues.
During the install of ESXI 6.5 I had a bunch of issues that I’d not encountered before. The first was with keyboards – a selection of modern gaming keyboards I had would not work once ESXi’s installer booted at all. I ended up using a late 1990s Sun Microsystems vintage keyboard I had lying around which seemed fine. I guess this is the first time I’ve tried ESXi with a consumer keyboard (rather than a basic Dell one in a rack) and didn’t spend much time investigating but something to look out for – no BIOS setting changes got anything working here.
The other really annoying thing with ESXi was its desire to not play ball with a USB-stick installation. One of the reasons I had selected ESXi over Hyper-V was so that I could install it on a USB stick. Many USB sticks were just not detected by the installer or would not partition – even one that I’d got ESXi 5.5 installed on. I eventually got it working on a USB stick I didn’t really want to use (it was a small collapsible one prone to falling out of machines) when eventually it started giving random errors during reboots. At this point I gave in and went with just using a small amount of SSD space on one of the datastore drives. I never got to the bottom of this, some of the drives could be fakes but I doubt all of them are – it’s more likely an issue between the consumer board and ESXi. I was able to work around this using SSD but never addressed the underlying issue. If you have this and must install on a USB stick my recommendation would be install ESXi as a VM in Windows (through VMWare Player) and then take that disk image and burn it to a USB stick (this also works for Hyper-V).
The final issue was the motherboard’s on-board Realtek network interface. The RTL8110 is no longer supported by VMware in ESXi 6.5. Whilst I had a separate Intel quad gigabit NIC (which worked perfectly) I wanted to use the Realtek one for management traffic and reserve the Intel card for iSCSI. To work around this you can install the other drivers from VMWare 5. This does work but is not supported. You can either merge these in to your ESXi 6.5 image before you start or do it via the other working cards afterwards (which is what I did).
To get your Realtek card working with ESXi 6.5 follow these steps:
- Download the drivers from http://vibsdepot.v-front.de/depot/RTL/net55-r8168/net55-r8168-8.039.01-napi.x86_64.vib and upload to your datastore (we’ll refer to its name a DatastoreName below)
- Enable SSH on the host
- SSH in as root to the host
- Type in the following two commands:
esxicli software acceptance set -level=CommunitySupported
esxcli software vib install /vmfs/volumes/DatastoreName/net55-r8168-8.039.01-napi.x86_64.vib
- Reboot your host
This should all work magically – but a couple of caveats:
- The first time I did this my Realtek NIC appeared but I lost the Intel ports. I never could get them back. They were detected and had a driver loaded but never mapped to an interface and no errors in any logs. A reinstallation worked fine.
- Some people have repeated other odd errors – including the card running for months, freezing up and then working fine after a reboot. I wouldn’t use this port for anything production-worthy.
And with that the 2017 16TB NAS is ready for action.
Performance
I tested numerous configurations with both iSCSI and SMB. I ran drive configurations including two-parity disk RAIDZ2 (ZFS’ version of RAID 6), single-parity disk RAIDZ (ZFS’ version of RAID 5) and mirrored stripe and just striped configurations (ZFS’ versions of RAID 10 and RAID 0). I ran all these tests with the default synchronous write policy and compression disabled. I separately ran some compression tests and found a very small fluctuation in speeds with anything up to default levels of gzip compression (highest gzip did drop around 10MBps of transfer). I also ran tests to see if ZIL disks or additional RAM would significantly change performance figures – they didn’t.
From the main results it became obvious really early on that iSCSI out performed SMB but it had some odd issues including speeds peaking and then dropping significantly before peaking again. I was able to get 102.32MBps out of my tests (which did beat the Drobo 5N) but I wasn’t happy with the lag spikes – these can be fatal when you want low-latency for virtual machines.
I then did something many people would consider bad – I swapped to an asynchronous write policy. This definitely increases risk in your storage solution (a sudden power loss and I’ve potentially corrupted the disks far more than I otherwise would) and I would not recommend it in production unless you can take other precautions (keeping replicas, backups, and a stable UPS with graceful ZFS shutdown would be musts). That being said, I am not in a production system and the results smoothed out and gave me a big performance boost.

Switching as async writes with RAID Z over iSCSI gave me a whopping 125MBps – completely maxing out the gigabit Ethernet. Whilst I haven’t tested the impact of link aggregation yet I did do a test from another VM within the same host (in effect removing the NICs limitations). This was able to pull down more than 250MBps (2.5Gbps over the network) – and that was sat on top of a virtual disk in a datastore on top of the iSCSI itself.
I’m really happy with this NAS – it looks great, it’s quiet and I can happily get a 26% performance increase over my off-the-shelf Drobo 5N with a lot more versatility. Whilst these parts could cost a lot if purchased new everything other than disks could easily beat the price of a Drobo 5N if purchased second hand and there’s scope for many more disks and configurations here plus a fairly low power drag (I notice around 100W at the moment).
I’ll be doing some posts on the ESXi and FreeNAS configurations that I’ve used shortly but for now enjoy the video above which includes all the benchmarks and shows off the build a little more.


Update – 2017-06-25
At the request of a comment I’ve added a few more details.
I’ve put some of the VM files up on pastebin – including the VMX file (GTP-NPT-SAN-02.vmx) which is the easiest way to see all configuration settings.
The disk configuration used for the VM itself (not data disks) is two SSDs that attach to the host’s SATA controller. One of these has ESXi installed with the remaining space allocated as an ESXi datastore. The other of these is just setup as an ESXi datastore. The VM was created on the first datastore and has a second disk on the second data store (so ESXi sees two disks to the VM – one per datastore). During FreeNAS configuration these are set up as a ZFS mirror for redundancy. Other than that they are plain old VMDKs – just containing FreeNAS. No aspect of mirroring / redundancy is applied at host/ESXi level other than physical disk separation. You can view them here GTP-NPT-SAN-02_0.vmdk / GTP-NPT-SAN-02_1.vmdk.
The physical NICs are made up of 4xne10000 drivers and 1xr8168 driver. The R8168 is just for management and the ne1000 is for iSCSI. The only driver I had to add in is the R8168 and details for this are in the main post.
Several people also questioned about link aggregation on YouTube. I never got around to this as my use-cases have never really saturated this link. I know a few people wanted more than 1GBps to a single host (rather than more than 1GBps available to multiple hosts) – this doesn’t work as you’d expect with link aggregation and I’d strongly recommend a cheap 4GBps Fibre SAN with some HBAs/old Brocade switch from eBay instead – this won’t cost you much more than £40 for a couple of machines.

I see that you are using not-ecc ram in this build. Is that because freenas is under esxi and ecc isn’t needed?
LikeLike
Simply a lack of ECC RAM for this build as the random parts I had going for it were consumer grade ones. I wouldn’t recommend not using ECC for production purposes for the same reason I wouldn’t recommend the async tweaks I made but as this is non-critical test lab at home I’m OK with that risk. In a production environment I’d definitely use ECC and in fact this is the only system I have that isn’t ECC apart from one Celeron build. Definitely get ECC if you can.
LikeLike
Please do share details on your VM settings, eg all the intricacies of the VMDKs and network adapter drivers you went for.
LikeLike
Post is updated with links and some more details 🙂
LikeLike
Hi guys, I’m deploying a FreeNAS 11 server as iSCSI SAN for VMware vSphere 6.5 Cluster (2 nodes). It has 4 x HDD 1TB. I’m not sure about best storage settings to use in FreeNAS for performance (VMs). Would I use a RAID hardware controller, a RAID-Z1 or Mirrors in ZFS? I’ve read that Mirrors are almost always faster than RAID-Z groups, especially for the cases that are interesting to iSCSI storage for virtualization.So, What would be better in my scenario?
LikeLike
If capacity isn’t your biggest concern then a striped mirror is going to be your best speed/resilience combo is most circumstances. That would only give you 2TB of usable space in this configuration. Don’t use hardware RAID if you’re using ZFS it can actually slow things down and make it more difficult to restore from a failure – you want your disks to be presented to your FreeNAS host as-is.
LikeLike